Homemade malt mill
 Crushing malt is an important step in brewing. It is important to crush the malt finely so that all starch is easily accessible for conversion into sugar, but care must be taken not to damage the husks too much since they are essential to the lautering process. An ideal mill for the job is a roller mill, since it crushes flour out of the malt grains while leaving the husks largely intact. As an exercise in metalworking skills I set out to build my own malt mill.
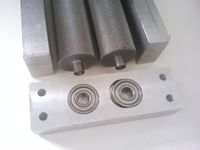
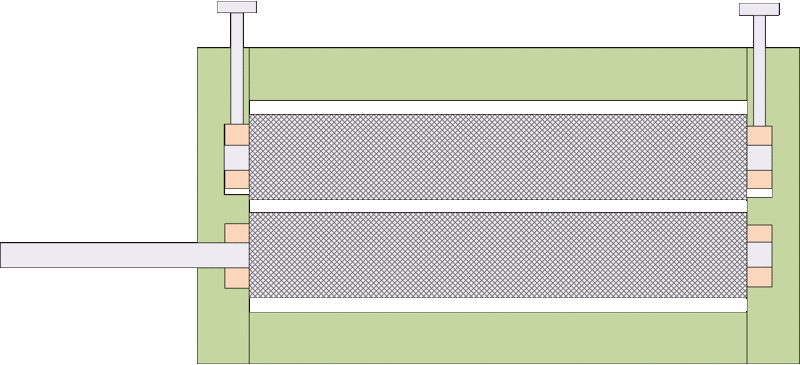
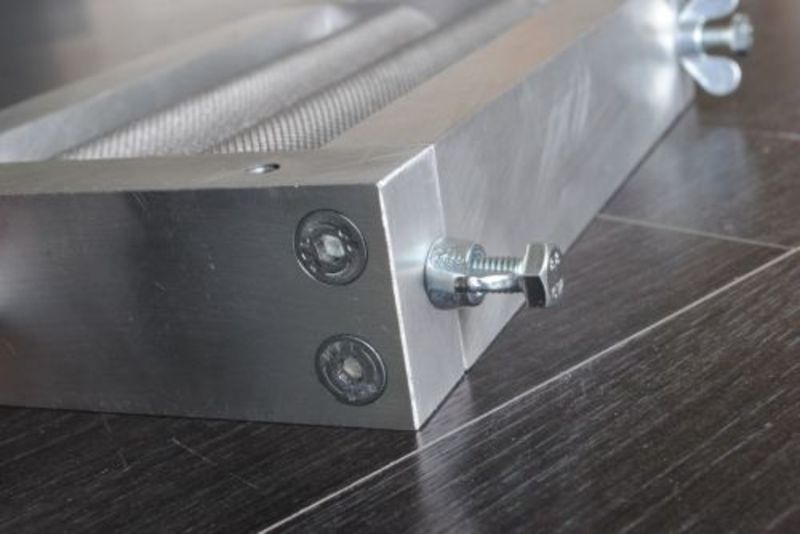
The mill consists of 2 cylindrical rollers that run in bearings. The rollers are encased in a rectangular frame. Two bolts protruding from the sides allow for fine adjustment of the gap between the rollers.
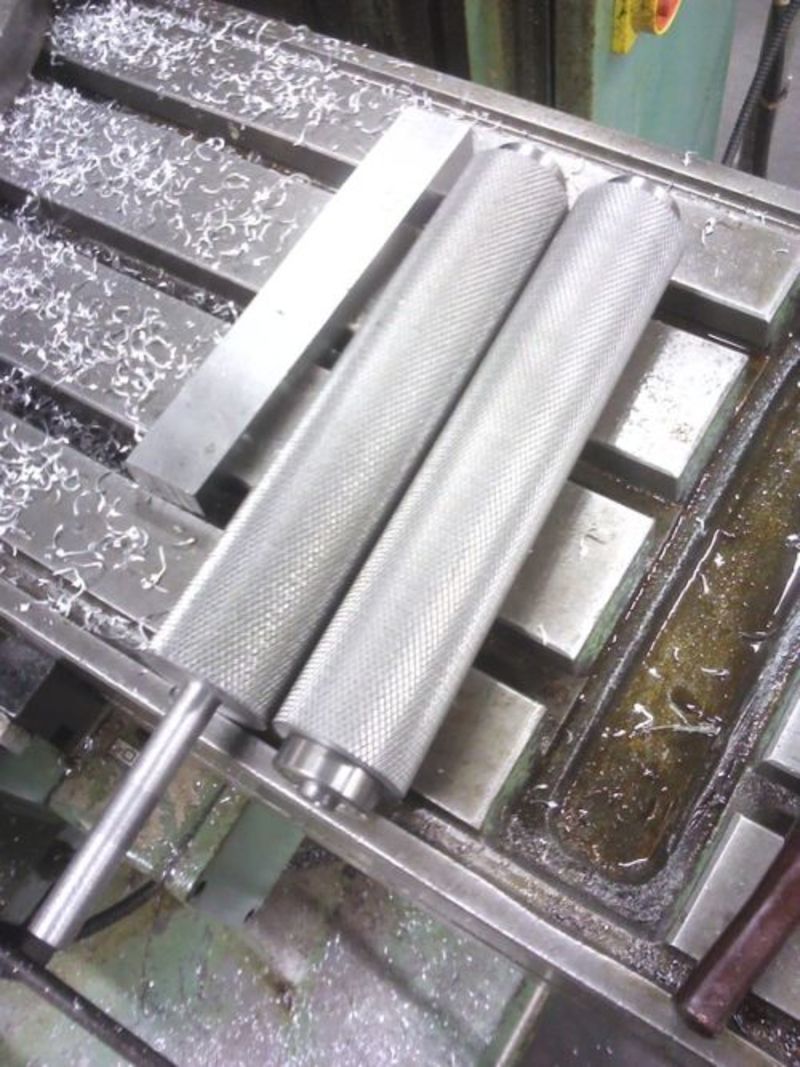
A decent lathe makes short work of turning the rollers to size. Here I am turning the drive axle on one of the rollers.

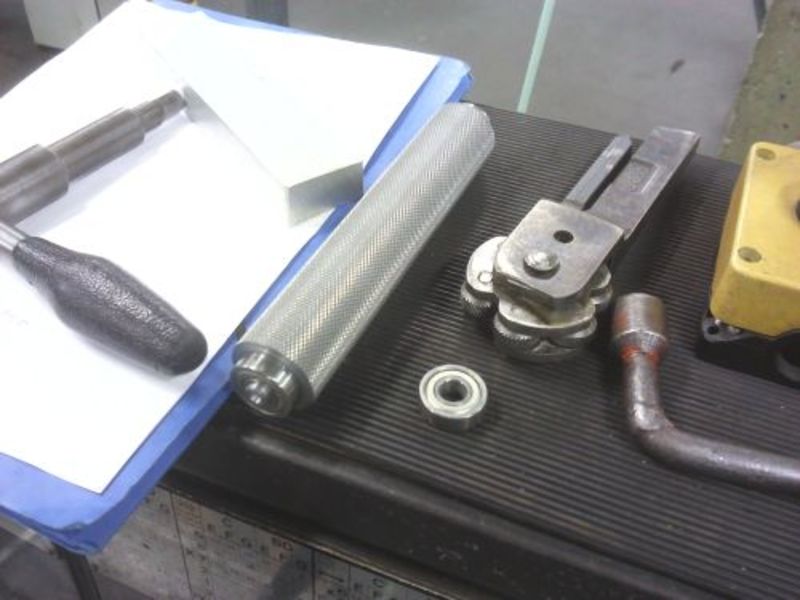
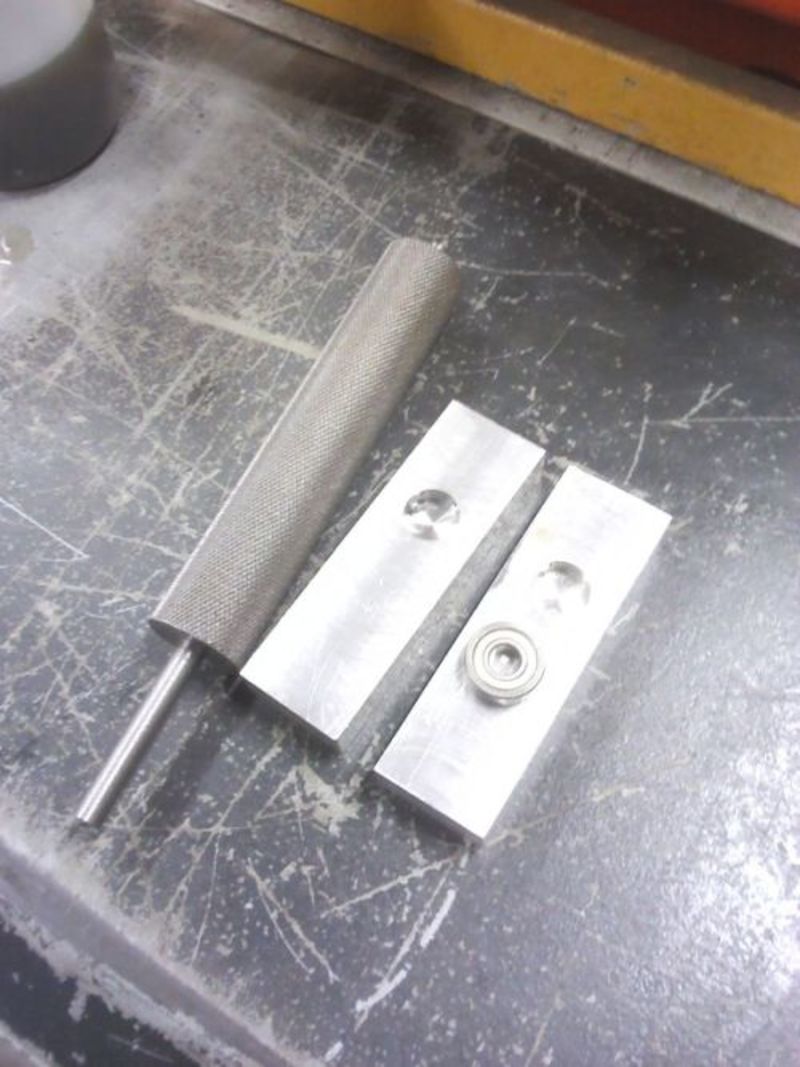
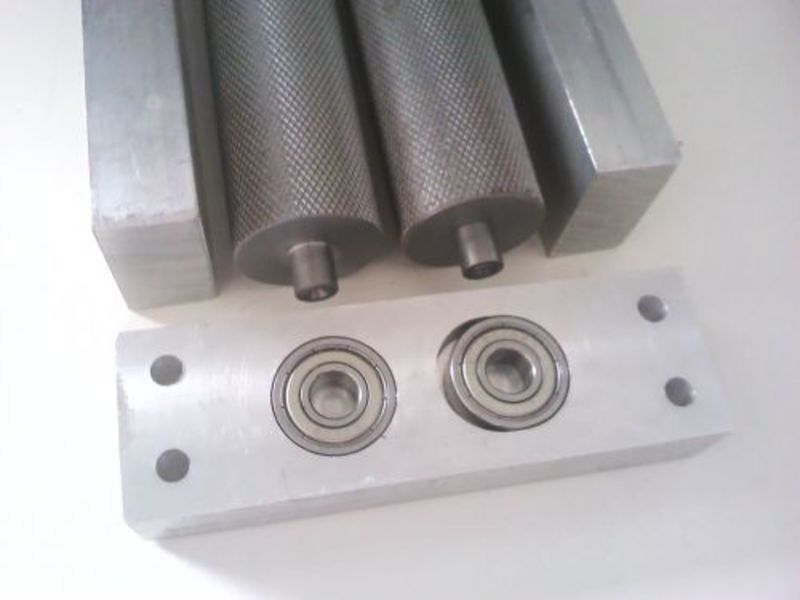
Here the first roller is finished; turned to size, knurled, and with the ball bearings fitted. On the piece of paper next to it is one of the 4 aluminium blocks that will become the frame.
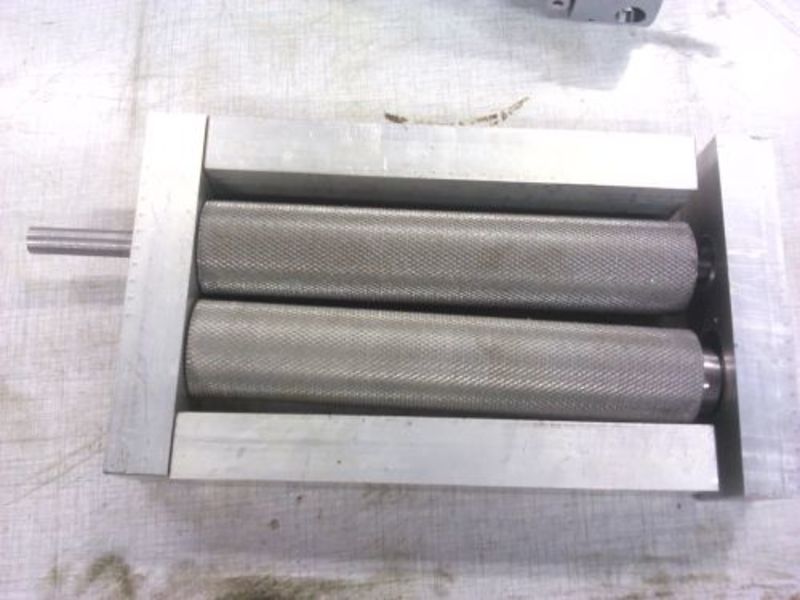
With both rollers completed, a rough fitting of the frame is in order. One of the rollers obviously has a long shaft which will extend beyond the frame to allow the mill to be driven with a hand drill.
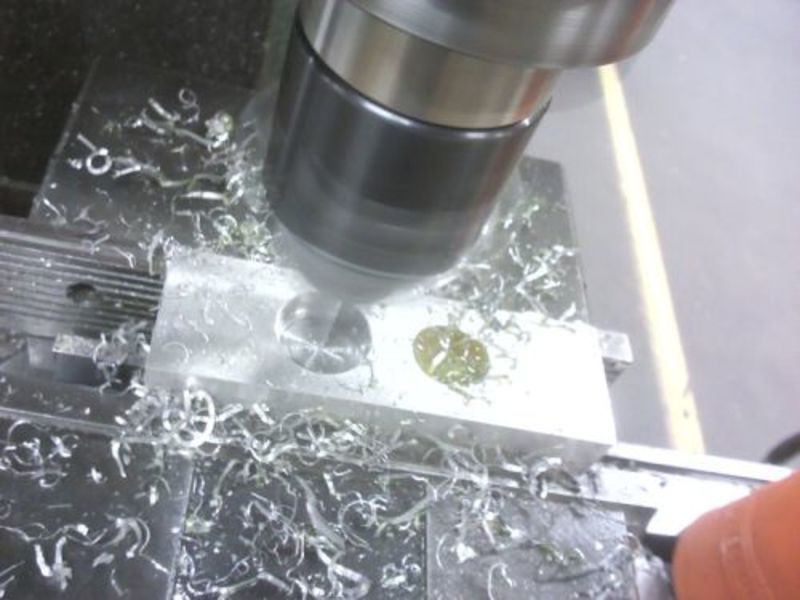
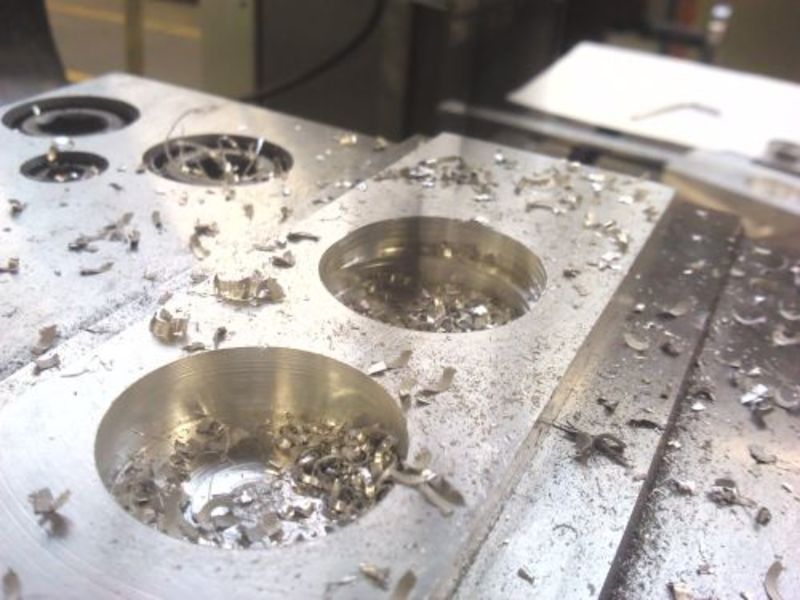
The short pieces of the frame have been cut and milled to size, and the first openings have been made which will later hold the bearings. First they have been roughly drilled using a 20mm end milling bit.
Then the openings have been further widened to the outside dimensions of the bearings.
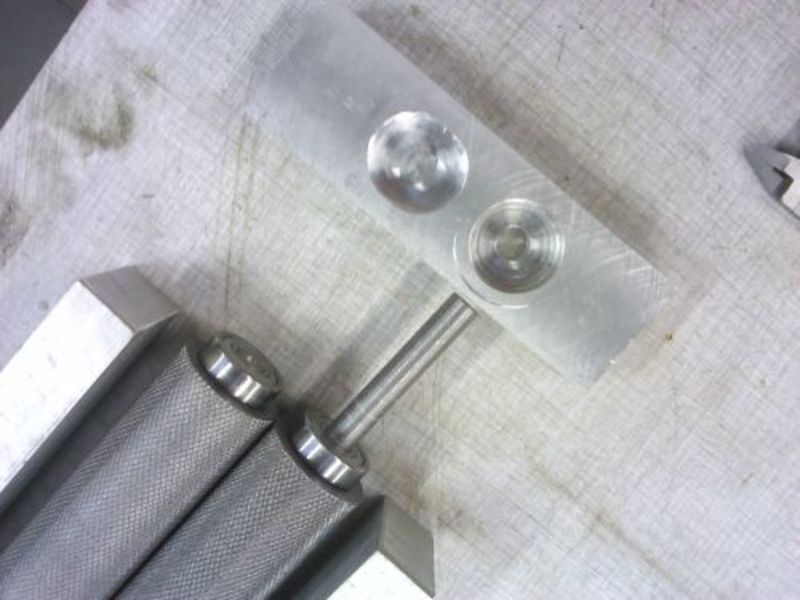
Here both holes have been made to size. One of the openings has been milled as a slot, which accommodates a 3mm travel of one of the rollers. This enables precise adjustment of the gap between the rollers. The other opening has a hole drilled through for the drive shaft.
With one of the end pieces of the frame finished, it’s time for another test fit. It’s quite a sturdy frame! All materials were found on the scrap yard, and apart from aesthetics I found no reasons to mill all that aluminium down to slimmer dimensions.
Here I am milling the slot-shaped opening in the second end piece.
The second end piece is now complete. The holes for the bolts that will hold the frame together have also been drilled, the corresponding side sections are still missing a drilled and tapped hole to accept these bolts.
Now it’s time to drill one of the 2 holes for the set-screws that will act on one of the rollers’ bearing to lock the gap between the bearings.

The frame takes a lot of milling work, but having good equipment available sure helps.
With the frame complete, the malt mill can be assembled. The set-screws have been fitted with a fly nut to lock the gap setting in place.

Having good equipment helps deliver quality work. All bolts (M6) that connect the frames have chamfered holes so the bolts sit flush.
The rollers have been carbonized and heat hardened to prevent the malt from damaging the knurling on the rollers. I have heard feedback from fellow brewers that this is an issue with non-hardened metal.
A hopper was constructed out of 1mm aluminium sheeting. It holds about 10kg of malt, so all malt for a brewing session can be milled without re-filling. The malt mill was installed on a piece of plywood, which has been cut to size so that it sits firmly in place on top of an old cooler.
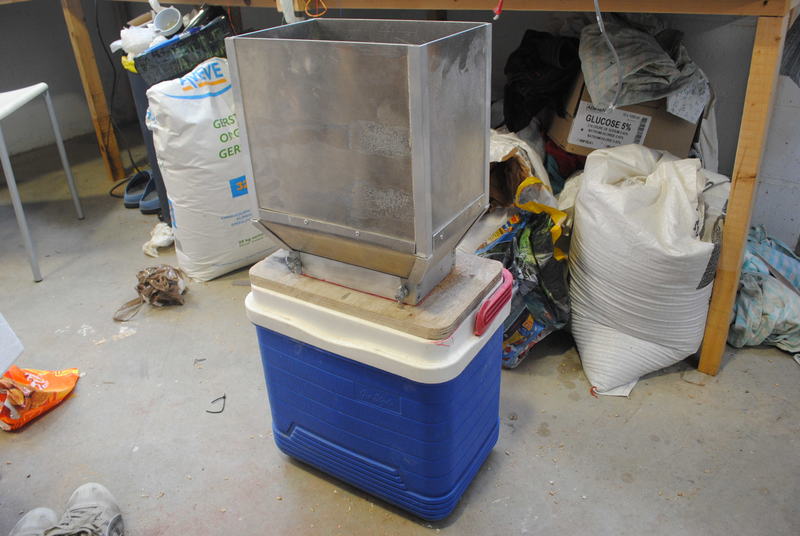
When inverted the hopper and malt mill fit inside of the cooler for easy storage.
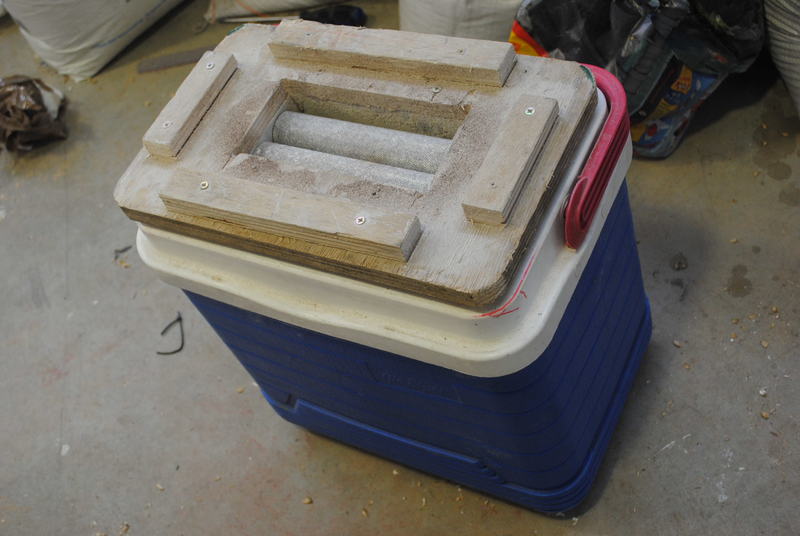
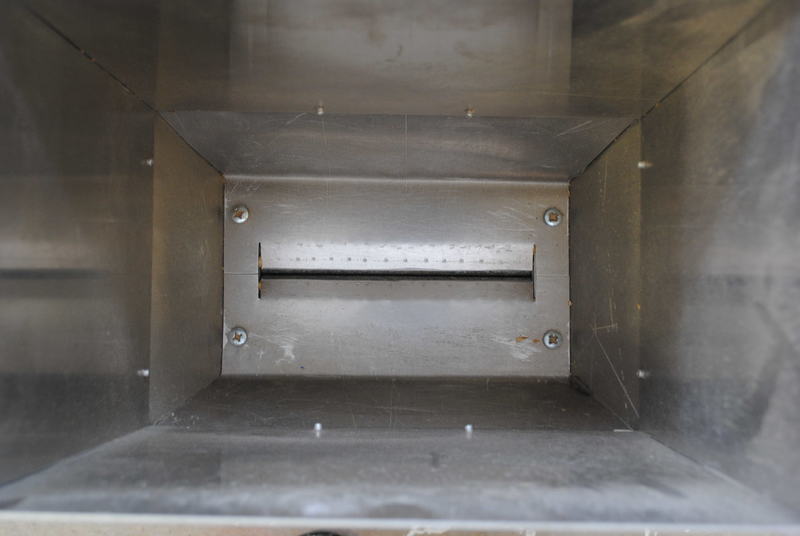
The inside of the hopper has a base plate with a carefully adjusted gap, which makes for a slow but steady flow of the malted barley without clogging the rollers. This acts as a finger guard as well.
If you take into account some 16 work hours spent, I don’t believe this malt mill is any cheaper that a commercial model, especially given the cheaper Chinese import these days. It was however a fun exercise in metalworking, and will give me lots of pleasure for years to come!
Resources
Forum post with further details and discussion (Dutch)